As more and more people are becoming concerned about the environment, electric vehicles have become the vehicle of choice for those who plan to buy a new car.
And with its rise in popularity, more homeowners are looking to integrate charging stations into their personal spaces. If you own a metal carport, you already have a sheltered and accessible area ideal for EV charging.
But how do you go about installing a charging station in such a structure? This comprehensive guide walks you through the considerations, planning, installation, and maintenance of an EV charging station in your metal carport.
Understanding EV Charging Basics
Before jumping into installation, it is essential to understand how EV charging works. Electric vehicle chargers are categorized into three main levels, each offering different power outputs and charging speeds. Your choice among them depends on your vehicle’s battery size, your driving habits, and how quickly you need to recharge. Knowing the capabilities and limitations of each level will help you make a better-informed decision for your home setup.
Level 1 chargers operate using a standard 120V outlet, the same kind you use for household appliances. While convenient because they require no additional electrical work, they are the slowest option—often adding only 3 to 5 miles of range per hour of charging. This makes Level 1 chargers suitable only for those who drive short distances daily and can afford to leave their vehicle plugged in overnight or longer.
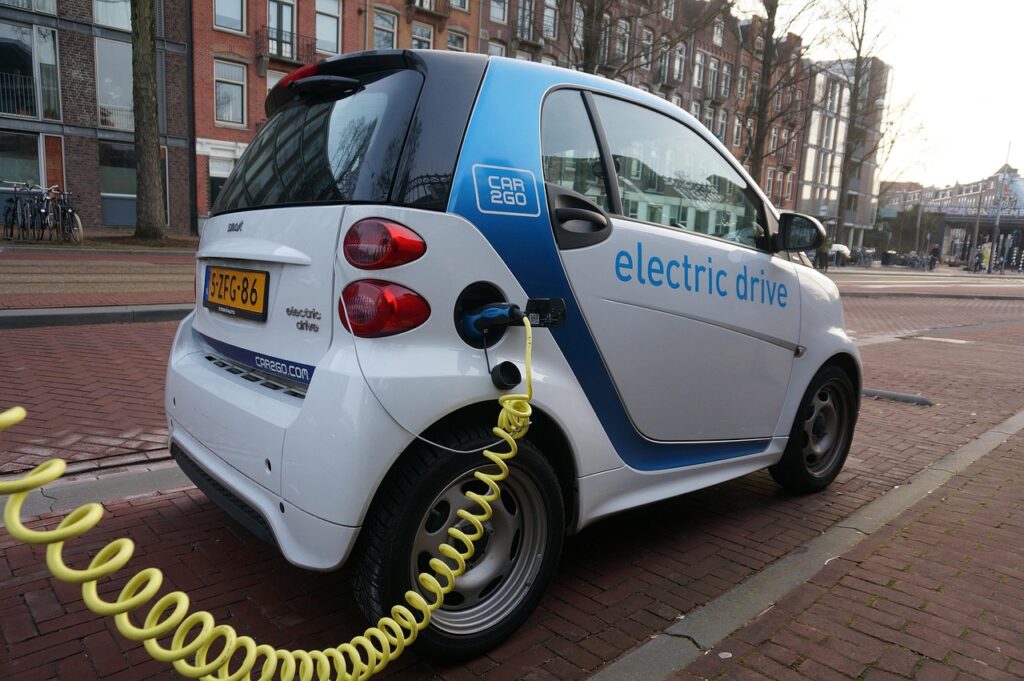
Level 2 chargers, on the other hand, require a 240V outlet and can deliver much faster charging speeds, typically adding 20 to 30 miles of range per hour. This level is ideal for home use and is the most popular choice among EV owners installing a personal charging station. The faster turnaround time ensures that your vehicle is ready to go in just a few hours, making it practical even for those with demanding schedules or multiple daily trips.
Level 3 chargers—also known as DC Fast Chargers—deliver power at a much higher rate and can recharge an EV to 80% in as little as 30 minutes. However, they require specialized equipment and substantial electrical infrastructure, making them unsuitable and cost-prohibitive for residential use. As a result, for most metal carport setups, a Level 2 charger offers the best combination of affordability, efficiency, and ease of installation.
Assessing Your Carport’s Readiness
The first step is evaluating your metal carport’s existing structure and its capability to house an EV charging station. Look at the following:
Electrical Capacity: Check if your home’s electrical panel has enough capacity to add a 240V circuit. You might need to upgrade the panel or add a subpanel.
Weather Protection: While metal carports are open, you’ll need to protect the charger and wiring from direct exposure to rain, snow, and sunlight. Consider partially enclosing a section of the carport or installing weatherproof casings.
Wall or Mounting Surface: Ensure there’s a suitable surface for mounting the charger. If the carport lacks walls, you might need to install a post or pedestal mount.
Planning the Installation
Planning is crucial for a smooth installation. Here’s what you should include:
Permits and Regulations: Contact your local municipality or building authority to understand the required permits. Electrical work often needs inspection and approval.
Professional Consultation: Hire a licensed electrician familiar with EV charger installations. They can assess load requirements, ensure code compliance, and safely wire the system.
Location Selection: Place the charger in a spot where the charging cable can easily reach your EV’s charging port without creating tripping hazards or excessive tension.
Electrical Requirements and Upgrades
The main technical task is wiring the 240V circuit from your main panel to the carport. Here’s how it’s usually done:
Cable Routing: Trenches may need to be dug if the panel is far from the carport. Use conduit rated for outdoor use to protect the cable.
Breaker Installation: Your panel will need a double-pole breaker rated for the amperage of the charger. Most Level 2 chargers require a 40-amp circuit.
Ground Fault Protection: Electrical codes often require EV chargers to be protected by a GFCI breaker or integrated GFCI protection.
Choosing the Right Charger
With dozens of EV chargers on the market, choosing the right one can be overwhelming. Key considerations include:
Amperage: Higher amperage means faster charging, but it also requires heavier-duty wiring and may cost more.
Smart Features: Many modern chargers come with Wi-Fi connectivity, smartphone apps, scheduling, and energy monitoring.
Cable Length: Make sure the charging cable is long enough to reach your EV comfortably without being too long to manage.
Weatherproof Rating: Look for chargers with NEMA 3R or better ratings for outdoor use.
Installation Process
Once you have selected a charger and ensured your electrical setup is ready, it’s time to install. Here is what to expect:
Mounting: Install the charger on a wall, pole, or pedestal. Ensure it’s stable and positioned for easy access.
Wiring: The electrician will connect the charger to the power supply, taking care to secure all conduit and check for code compliance.
Testing: Once everything is connected, the electrician will test the system to make sure it’s delivering power correctly and safely.
First Charge: Plug in your EV and verify that the charger is working. Some smart chargers may require Wi-Fi setup and firmware updates.
Protecting Your Investment
Your charger is a valuable asset that requires protection from the elements and misuse. Consider these precautions:
Weather Protection: Even if your charger is rated for outdoor use, installing a small awning or enclosure can prolong its life.
Surge Protection: Install a surge protector to guard against electrical spikes that could damage your charger or vehicle.
Physical Barriers: Use wheel stops or bollards to prevent accidentally hitting the charger with your vehicle.
Routine Maintenance
Maintaining your EV charger is relatively simple but essential for longevity:
Regular Inspection: Periodically check for visible wear, frayed cables, or signs of corrosion.
Cleaning: Wipe down the unit with a damp cloth to remove dust and debris. Avoid harsh chemicals.
Software Updates: For smart chargers, keep the firmware up to date to benefit from security patches and new features.
Handling Multiple EVs
If your household owns more than one EV, you might need additional charging capacity. Options include:
Dual Chargers: Some units can charge two vehicles simultaneously.
Load Sharing: Certain smart chargers can alternate power between two EVs to avoid overloading your circuit.
Additional Circuits: If you have the panel capacity, install another 240V outlet to charge vehicles separately.
Enclosing the Carport
While not mandatory, enclosing your metal carport can enhance weather protection and security for your EV charger. You can add partial walls or even convert your carport into a full garage. Just ensure that any modifications allow for ventilation and accessibility.
Security Measures
Prevent unauthorized access and ensure safety with these tips:
Locking Features: Some chargers have built-in locks or require an app to activate.
Lighting: Install motion-sensor lighting to deter tampering and improve nighttime visibility.
Cameras: A small security camera can monitor activity around your carport and charger.
Cost Considerations
Installing an EV charger in your metal carport involves various costs:
Equipment: Level 2 chargers range from $400 to $800, depending on features.
Installation: Electrical work can cost between $500 and $2,000, depending on distance, panel upgrades, and labor.
Permits: Depending on your location, expect to pay $50 to $300 for permits and inspections.
Enclosures or Mounts: Additional materials for mounting or weatherproofing may add to the cost.
Incentives and Rebates
Do not forget to check for available incentives before starting your installation. Many states, cities, and electric utility companies offer financial incentives such as rebates, tax credits, and reduced-rate installation programs to encourage the adoption of EV infrastructure. These rebates can significantly offset the upfront cost of purchasing and installing a Level 2 EV charger, especially if you are also upgrading your electrical panel or adding new circuits.
Additionally, the federal government often provides tax credits for residential EV charger installations, allowing homeowners to claim a percentage of the total installation cost when they file their taxes. Staying informed about current programs can result in substantial savings and make the decision to install a charger in your metal carport even more financially appealing. Be sure to research these incentives in your area and gather the necessary documentation to apply, as deadlines and eligibility requirements can vary.
Conclusion
Installing an EV charging station in your metal carport is a forward-thinking investment that enhances your property’s value and makes owning an electric vehicle more convenient. With careful planning, the right equipment, and professional installation, you can create a safe, efficient, and weather-resistant charging solution right at home. It could be that you are preparing for your first EV or accommodating a growing fleet, integrating a charger into your carport sets you up for a greener, smarter future.